How to Use Otis Gun Cleaning Equipment
Otis offers a wide variety of cleaning products for a wide variety of firearms and firearm owners. If instruction manuals aren’t your cup of tea, check out our library of instructional videos. From the fundamentals of creating a proper size swab, to more detail such as using the B.O.N.E.® tool. Check out some of the top videos below or visit us at youtube.com/@otistechnology
Otis 3-Step Gun Cleaning Process
The Otis 3-step gun cleaning process—often summarized as "Wet Patch, Bore Brush, Dry Patch"—is designed to thoroughly clear carbon, copper, and lead fouling from a firearm's barrel. It uses Otis's signature Memory-Flex cable to clean from breech-to-muzzle to protect the barrel's crown.
The Otis 3-Step Gun Cleaning Method
- Wet Patch: Attach a slotted tip to the Memory-Flex cable, thread a patch onto it, and apply a few drops of gun solvent or CLP. Pull the patch through the bore from the breech to the muzzle to loosen fouling and wet the barrel.
- Bronze Brush: Replace the patch with the correctly sized bronze bore brush on your cable. Pass it through the bore (again, from breech-to-muzzle) to scrub away carbon, copper, and lead residue.
- Dry Patch: Switch back to the slotted tip with a clean, dry patch. Pull it through the barrel to remove the loosened debris and any remaining solvent. Note: You may need to repeat these three steps multiple times until a patch comes out completely clean. Why Breech-to-Muzzle? Unlike traditional rigid cleaning rods pushed from the muzzle end, Otis cables are pulled through from the chamber (breech) out toward the barrel tip. This method pushes all debris and dirty solvents out of the barrel rather than scraping them into the chamber, and protects the delicate rifling at the muzzle from being damaged by the cleaning too
How to Tie a Patch
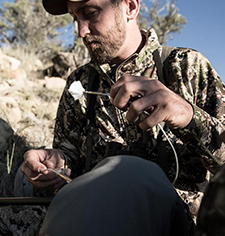
Otis round gun cleaning patches are designed to provide a 360-degree cleaning swab. Made of 100% cotton, they are lint-free, absorbent, and engineered to be rotated multiple times so you get up to six fresh cleaning surfaces per patch.
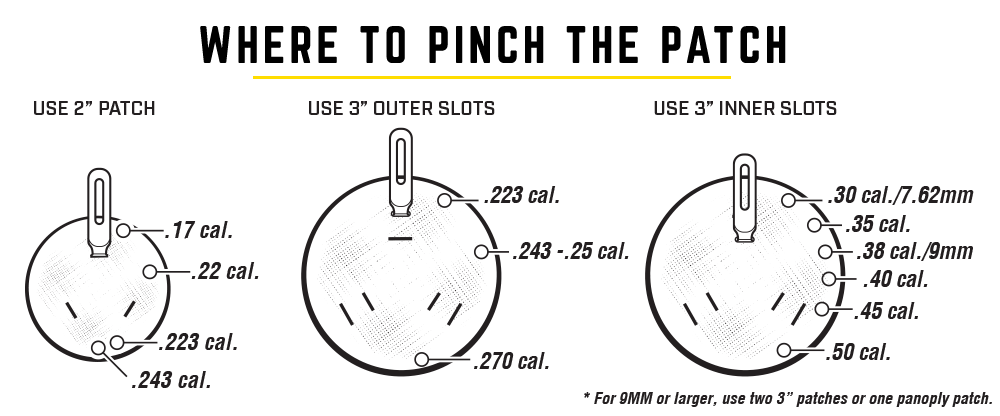
Proprietary Tie Method: When properly threaded and "pinched" onto an Otis slotted tip, the patch transforms into a circular swab that uniformly scrubs the bore
Universal Compatibility: Otis patches clean a wide variety of calibers and are available in 2" (for .17 caliber - .223) 3" (for .243 to 12/10 Gauge Shotguns. Use the outer slots for .243 caliber and larger and the inner slots for .30 caliber and larger. For shotguns be sure to use the correct size Patch Saver. Panoply 3" are a thicker material designed for use on large calibers .30 caliber and up
How to Use Otis Ripcord
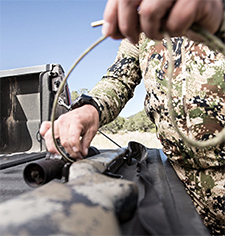
To use an Otis Ripcord on your unloaded firearm with the action open, you simply feed the narrow, threaded tip into the chamber and pull it completely out through the muzzle. Because it is wrapped in heat-resistant Nomex®, you can use it dry at the shooting range while the barrel is still hot to quickly clear out loose carbon.
How to Clean Pistols
How to Clean Rifles
How to Clean Shotguns
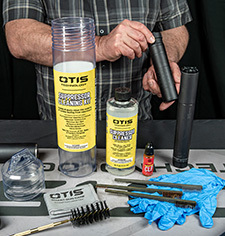
How to Clean Suppressors
How To Use Otis Tools (B.O.N.E. Tool, Star Chamber Tool, & More)
How the Otis FLEX System® Works
The Otis FLEX System® is built around modular cases and interchangeable organizers that can be configured to fit your preferred setup. Cases connect using integrated locking tabs, allowing multiple FLEX cases to securely snap together for storage and transport.
Inside each case, removable parts organizers hold cleaning components in place. Organizers can be moved, removed, and exchanged between compatible FLEX cases, making it easy to reorganize your kit as your needs change.
Additional attachment points throughout the case allow organizers to be positioned in different locations, while select organizers can also be installed in the case lid to maximize available storage.
All FLEX cases and organizers are designed to work together, so components can be mixed and matched across the entire Otis FLEX System®.
For more information visit https://otistec.com/otis-flex-system-faq/
See the instruction sheets below for more information on the complete process, as well as additional instruction on our specialized cleaning tools.